
Around this time last year, like many others, I decided that I wanted to try my hand at gardening. I had always been curious about it, but I never felt that I had the time to dedicate to building and maintaining a garden. Well, of course that all changed when the world as we knew it shut down and we all began to quarantine at home. I was always so intrigued by my parents’ stories about their parents and grandparents growing things, raising animals, and them eating fresh food out of the garden or off of the farm. Truth be told, I was thiiiis close to also getting a few chickens and turning my suburban quarter-acre into a mini farm until I realized that hens are LOUD, and my neighbors probably would not trade their sleep for free fresh eggs delivered to their doorstep.
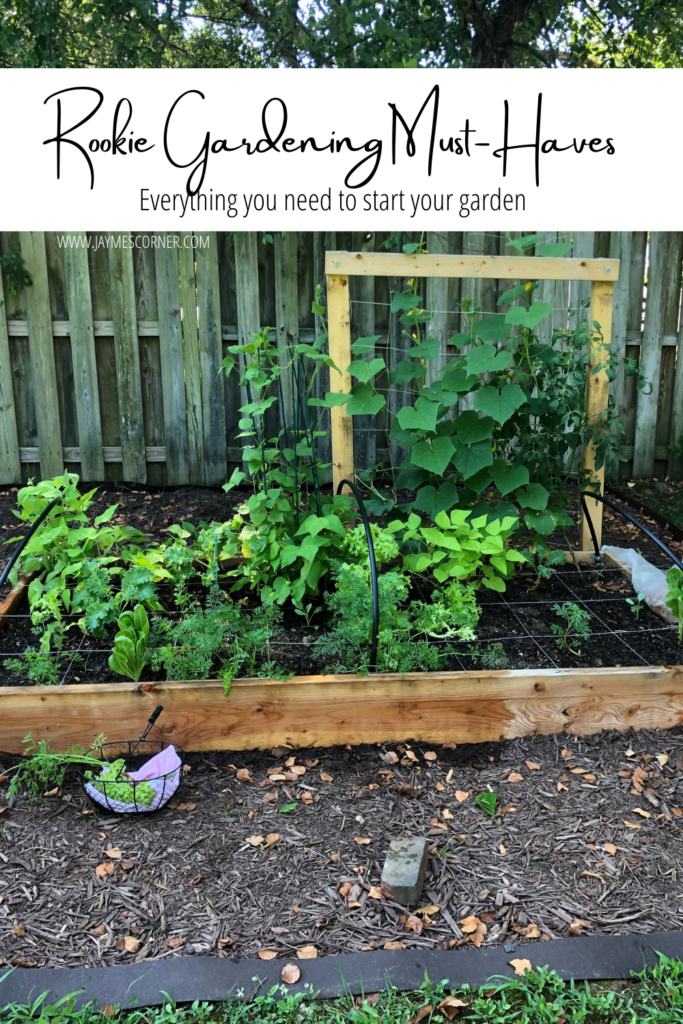
Anyway, I decided to start with a small garden consisting of 2 raised garden beds that I built myself (with hubby’s help) on a corer of my backyard that hubby and I worked too hard to clear and prep for this new venture. Let me just say that I learned A LOT in my first year, including the things that I am glad that I had on hand and other things that I wish I had better researched and prepared for beforehand. I’d love to help others learn from my rookie mistakes, so if you are interested in getting a garden started this year keep reading for my Rookie Gardener Must-Haves!
This post contains affiliate links, which means I may earn a small commission when you make a purchase through my links at no additional cost to you. Thank you for supporting my blog by shopping the links in this post!
Proper Gear

While you don’t have to get over-the-top fancy, there are a few basic items that you would surely thank yourself later for snagging (I know I did)! Here’s a head-to-toe run-down of what you may want to look at purchasing
- Sun Hat – You’re going to want to grow most of your things in a nice sunny spot, and with that can come sun beaming down directly into your eyes on a clear sunny day. I like this hat especially because my locs make it difficult to find hats that fit nowadays, but really any hat with a brim to protect your face and neck will do.
- Apron – This one I didn’t have, but I will surely be getting one this year! I’ve left my trowel and scissors around so much last year. Thank goodness my gardening space was small, but it was still an annoyance, for sure! The extra pockets of an apron can come in handy, even if you need to do a small harvest and you don’t have your basket on-hand.
- Gloves – Many gardeners like to get their hands dirty, and some don’t, but I like to have the option. I used mine particularly for weeding, as weeds can sometimes have rough or uncomfortable texture to them (defense mechanism for them, I guess). Also, even your fruits may have some texture to them, like squash plant leaves. And let’s not talk about the bugs that you need to *ahem* destroy on sight to keep them from ruining your harvests… I’m definitely not picking up or squishing those guys with my bare hands.
- Boots – I enjoyed having my rubber rain boots because they are pretty-much indestructible, slip on and off easily, work well on wet surfaces to keep from slipping, and are inexpensive so I was not worried about dedicating them strictly to gardening and getting them dirty.
- Long Socks – I didn’t really buy long socks specifically for gardening, but I sure dug through my sock drawer to find some after a few too many mosquito bites on the ankles. If you don’t have any crew socks, I definitely recommend having a pack on-hand.

Resources & Tools
When it comes to resources and tools, there actually aren’t many things that you NEED to get started gardening; however, here are a few basics to get you started.
6. Trowel – Just a little shovel to help you loosen up the dirt, mix in any compost or other beneficial items into the soil, and dig a space for your plants if you plan to start with transplants instead of seeds (if you plan to start with seeds, you can really get started with just a pencil or pinkie to dig a hole just the right size for those.
7. Cultivator – This is the fork-like tool that will help you mix in your compost as well. This tool can also help clear out dead leaves or weeds, so it’s handy to have available (of course, you could use your hands for this as well).
8. Pruners – Last year I made do with a pair of cheesy scissors, but cutting tomato vines and squash off the vine with those was not easy at all. This year, I’ll be upgrading to a good pair of pruners for sure!
9. Foldable Kneeling Bench – You NEED to get this, whether you have raised beds or are planting directly into the ground. I didn’t use mine nearly enough last year and I still can’t figure out why; however, it is truly a back-saver and knee-saver for those days when you’re sowing seeds, weeding, or when (not if!) you have your huge harvest to trim up.
10. Hose Wand – I absolutely loved having this wand to water the garden with each morning (attached to a super long hose). I was able to water directly inter to soil (not the leaves, that can leave you with a moldy diseased crop) without breaking my back. I also loved that I can change the flow on this particular want to blast off some little aphids when I needed to.
11. Bamboo Stakes, Tomato Cages, and/or Trellises – I built my Trellises into my beds using a nylon netting, which was inexpensive and worked decently; however, I made the mistake of not having cage supports for things like bell peppers, which fell over with the first bad summer storm. I also got stakes for my green beans a bit later than I should have. Don’t be like last-year me. Have these things on-hand so that you don’t sacrifice good produce before rushing out to get them.
12. Harvest Basket – This may seem obvious, but make sure you have something inspiring (or at lest practical) to collect your goods! I had a cute wire basket that i repurposed, but I found that my smaller things like green beans and the ends of my carrots would slide through. I’m still on the hunt for a wicker basket that i love, but the practicality of a colander basket or a garden hod might sway me this year. Being able to hose down the veggies right in the basket before bringing them in the house seems like a winner to me!
13. Composting Supplies: I will admit, composting seems like a scary and overwhelming subject, which is why I did not take it on last year. HOWEVER, I have started this year, and realize that there was nothing overwhelming or scary about it! Set up a compost collector in your kitchen (I have this one, which also uses these compostable bags), set up a compost pile or barrel in your yard (I am using this barrel), put your fruit and veggie scraps in the collector to take out to the pile ever few days along with other things like shredded paper, cardboard pieces, leaves, coffee filters, and twigs, spin the thing, and let nature work! It’s so good for your garden, I figured it can’t hurt to give it a try. I will probably do a whole post on my experience with composting after I’ve done it a full season.
BONUS RESOURCES: Raised Bed Gardening for Beginners: Everything You Need to Know to Start and Sustain a Thriving Garden, All New Square Foot Gardening II: The Revolutionary Way to Grow More in Less Space – These are two books that I read and found extremely helpful in planning my garden, troubleshooting issues, etc. I still reference them at lest once per week! I also lean heavily on the knowledge of great Instagram gardeners such as Brandy of @easylivinggardens, MiMi of @unlikelymartha, Tamara of @taminthegarden, and @blackgirlswithgardens. Tamara also shares other gardeners from each zone so that you can connect with other gardeners on the same growth cycle and who deal with similar weather patters, pests, etc. as you.

(Organic) Pest. Control.
This one is a major key! Unexpected pests were the downfall of my first year of gardening. The worst part about it was, with a bit more preparation, it could have been avoided! Here are a few things that I implemented a little later than I should have or plan to implement this year.
14. NEEM OIL – Neem oil spray is one of the few organic-safe pesticides out there, and they work one of every gardener’s biggest annoyance… APHIDS (along with other soft-bodied insects)! These little boogers somehow find your plants, slowly destroy them by turning them all sappy, and then come ANTS, which are aphids’ best friends, to wreak further havoc. Do yourself a favor and stock up on some organic neem oil spray before the season hits. I don’t know about your area, but after the season really got started it was almost impossible to find locally and even online without an outrageous pricetag.
15. Bt (Bacillus thuringiensis) and Sprayer– This is another organic-safe pesticide (the last one I’ll recommend here, I promise), and this one takes care of catepillars, worms, and other insects that thin you have planted your leafy goodness just for them. While I was able to keep my aphids at bay last year, cabbage loopers found me and took my lush garden to its demise (I know that sounds dramatic, but it was literally over a period of only 1-2 weeks). Part of the issue was lack of research and knowing what they were even after spotting one (I thought it was an inchworm), and the other part was thinking nothing of the “inchworm” until it was waaay too late to control them. Again, don’t be last-year’s me. Get the Bt.
16. Insect Barrier Netting – I got this one from Instagram garden extraordinaire Brandy of @EasyLivingGardens, who was kind enough to even find it on Amazon to send me the link. This can protect your seeds and little sprouts from insects and birds until they are strong enough to survive any minor attacks on their own (or you can leave them covered like I did most of the season, but beware of interfering with pollination). Note, this is NOT a floating row cover. Those are made to insulate heat to extend your gardening season into the colder months, which does NOT work well in spring/summer when it’s hot. Made that mistake first and burned up half of my greens and green beans. Don’t do that!
17. Bird Netting – You will need this to keep birds and squirrels from snacking on your ripening fruit that you have been waiting all season for. I got 1 good tomato off of my 1 plant last year, and the rest were taken by some furry foe along with my single cantaloupe and one of my two watermelons. This definitely could have been reduced by adding the netting right when things started to fruit.
18. Fencing – Last, but most certainly not least, add some fencing around your garden area if you can. You can go as hard with this as you want to, from a no-dig fencing system (which is what I am trying out this year – panels, posts, and gate latch) to a DIY job at varying levels to professional installation. Last year before the cabbage loopers came a bunny (which quickly multiplied into a family of bunnies) to a groundhog. Somehow, one of my insect barrier netting covers was not secured and blew off of my bed. Of course it was the one with ALL of my leafy greens in it, including my beloved kale, collards, and lettuce. The bunnies or groundhog had the time of their lives! They nibbled my greens almost to the ground. Luckily, the greens came back, but I was SO devastated. This year, a fence was an absolute must, because I don’t mind the bunnies in my yard, but my garden space ain’t big enough for the 10 of us!

Well, that rounds out my gardening essentials for the beginner gardener. The most important thing is to have fun learning! One thing that I love so far is that it seems like I will never be done learning new things about the garden and how to grow good things. Let me know in the comments if you have any additional tips or tricks for beginners like me!


